 Here's the finished bike, ready to roll. It won't be clean for long. SE offered a green bike in this model year ('09) but they seemed to have been snatched up first. I would've preferred a green bike, but for the ~$200 savings I'll settle for red. I don't know what they call the color, but I call it "1990 Thunderbird SC Red". If you know me, you know why...
 Closer view. You sharper dudes out there might start to notice some non-stock parts, and you'd be right. The only thing I kept from the stock bike were the frame (duh), the headset, the wheelset, and the seat. Everything else was auctioned on eBay, save for a couple odds and ends worth keeping - the bottom bracket (a nice ISIS unit) and the stem (a nice light 100mm x 7d piece).
 While we're staring at the headset, I should point at that the stock headset appears to be a steaming POS. Now before you go off and say "well, what did you expect", please note I'm not here to say whether the bike is a POS or not a POS. I knew that for $400 I'd face a combination of pleasant and unpleasant surprises, so it's no big deal... just pointing out the good, the bad, and the ugly. So chill.
Anyway, the stock headset is just an old-fashioned ball-in-cage affair. The balls are small and the cups are crude, so when it takes a dive I'll just slap in a decent headset and go on with my life. The badge on the head tube is real nice.
 See, I told you it is a 1x9. That's a SRAM X.5 rear shifter there, and no front shifter. No, it doesn't have the snazzy name of the X.7, X.9, or X.0, but I used this one to maintain consistency with my other bikes. You see, the current X.5 is just like the last-gen X.7s I have on my other bikes.
 See, I told you it is a 1x9. That's a SRAM X.5 rear shifter there, and no front shifter. No, it doesn't have the snazzy name of the X.7, X.9, or X.0, but I used this one to maintain consistency with my other bikes. You see, the current X.5 is just like the last-gen X.7s I have on my other bikes.
The Titec carbon fiber bar and aluminum/carbon wrap stem were just laying around so they got pressed into service. The carbon bar will soak up some of the vibes from the rigid steel fork.
 Speaking of the steel fork, I had a barely used Salsa CroMoto Grande fork laying around so I installed it. This fork has more offset than the stock SE Landing Gear fork (43mm vs. 38mm) which will quicken up the steering. And heck I just like the looks of the contrasty black fork in place of the red stocker. Both have about the same axle-crown measurement: ~470mm, equivalent to an 80mm suspension fork. Both are steel. Also, the stock fork had v-brake posts and I was installing discs, so the Salsa disc-only fork is cleaner.
 Speaking of discs, here are the BB7s I installed. Why BB7s and not some funky hydraulic set-up? I've got BB7s on my other bikes. No brainer.
 Moving away from the front of the bike (finally), here's a shot of how SE does the bottom bracket and ties it into the chain stays. Sorta old school, but solid. And cripes, there's that GD plastic Shimano BB cup... yeah I know someone makes an alloy cup, but it costs about as much as a BB!
 The seat stays are mounted in the same fashion as the chain stays. There's good tire clearance for fat tires... the one here is a fat Kenda Nevegal which still clears even with the rear axle slid pretty far forward. That said, my '08 GF Cobia frame has even more tire clearance (and my '06 GF 293 has less...).
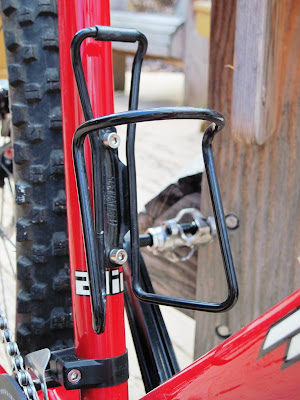 Why this exciting picture of the water bottle mount? Well, you may not be able to see it, but the water bottle mounting lugs are not set straight on the seat tube! The two on the down tube were straight, though. Batting .500 I guess. Luckily the water bottle cage is easy to bend so as to give the appearance that all is straight.
 Moving right along, here's the front end of the drivetrain. I had a Race Face Turbine crankset laying around, as well as a 30t chainring sans ramps and pins, so on they went. Yes this is a 94mm/58mm compact crankset, so I could even install a 29t chainring if I feel really feeble.
  The SRAM PC-991 chain is a tad on the long side as I may want to try out that new Shimano 12-36 cassette. Oh yeah - about the cassette - that's a SRAM PG-980 11-34 there. I wanted a cassette with a carrier to distribute the load to the freehub better, since SE implied it was aluminum. OK, they said the hub was aluminum - the freehub is steel. Shoulda guessed. With a steel freehub you can run pretty much any cheap cassette you want since the steel freehub won't be affected by individual cogs digging in, whereas cassettes with carriers should ideally be used with softer aluminum freehubs.
 Here's a good view of the combo chain tug / derailleur hanger. It works. Also seen here is the bolt-on rear axle which I believe is a conventional 10x1 mm thread. It's a cheap soft POS like the front, and yes it's even a little bent. I will either replace it or go to a QR set-up. I'm not sure the QR thing will work well with those monster axle mounting tabs though.
 Speaking of the steel fork, I had a barely used Salsa CroMoto Grande fork laying around so I installed it. This fork has more offset than the stock SE Landing Gear fork (43mm vs. 38mm) which will quicken up the steering. And heck I just like the looks of the contrasty black fork in place of the red stocker. Both have about the same axle-crown measurement: ~470mm, equivalent to an 80mm suspension fork. Both are steel. Also, the stock fork had v-brake posts and I was installing discs, so the Salsa disc-only fork is cleaner.
 Speaking of discs, here are the BB7s I installed. Why BB7s and not some funky hydraulic set-up? I've got BB7s on my other bikes. No brainer.
Those discs are 180mm, btw. I used 'em 'cause I had 'em. Note that Avid's adapters are for their 185mm discs. And yes, 5mm is a big difference on discs, so some clever adapter finagling had to happen. The front adapter is a 160mm rear adapter. Yes, just add 20mm to the rear adapter's size designation and - presto - you've got the equivalent front adapter size.
If you're REALLY SHARP you've noticed a quick-release skewer in place of the stock solid axle. First, about the stock solid axle: it's a 9.5mm x 26 tpi thread. Sort of odd, since most front axles are 9mm... found out the hard way since I ordered a 9mm assuming that's what it was only to find out I was wrong. So I got a Wheels Mfg. #10 hollow QR axle and cut it down to 111mm. Wow, those Wheels Mfg. axles are really nice compared to the ugly and soft stockers!
One strange thing with the Wheels Mfg. axle - it's a tad skinnier than the stocker. The stock solid axle measures out to nearly 9.5mm on the threads whereas the WM axle was between 9.3mm and 9.4mm. So things are a little looser on the WM axles... but that shouldn't pose a problem.
 Moving away from the front of the bike (finally), here's a shot of how SE does the bottom bracket and ties it into the chain stays. Sorta old school, but solid. And cripes, there's that GD plastic Shimano BB cup... yeah I know someone makes an alloy cup, but it costs about as much as a BB!
While we're here, a note about the general construction of the frame. First, the welds are nice - nicer than those on my '08 GF Cobia frame, for sure. Second, everything else is not as nice as my GFs. There is a strange set of ripples on the drive side of the downtube near the bottom bracket. Can't see it, but it's there and it's strange. And the paint (or is it a powder coating?) is nice and thick but chips easily... ask me about how the chain slipped it of my hands while I was installing it and how the derailleur slung it around at a crazy speed and chipped the paint on the seat stay (ouch). Yeah, my bad, but the paint seemed brittle. Some of the junctions between the stays and the frame are a little odd too... odd as in who cut that, a blind guy. And the rear v-brake posts aren't welded on at the same height and angle. No biggy for me as I'm running discs, but another oddity nonetheless.
 The seat stays are mounted in the same fashion as the chain stays. There's good tire clearance for fat tires... the one here is a fat Kenda Nevegal which still clears even with the rear axle slid pretty far forward. That said, my '08 GF Cobia frame has even more tire clearance (and my '06 GF 293 has less...).
 Why this exciting picture of the water bottle mount? Well, you may not be able to see it, but the water bottle mounting lugs are not set straight on the seat tube! The two on the down tube were straight, though. Batting .500 I guess. Luckily the water bottle cage is easy to bend so as to give the appearance that all is straight.
 Moving right along, here's the front end of the drivetrain. I had a Race Face Turbine crankset laying around, as well as a 30t chainring sans ramps and pins, so on they went. Yes this is a 94mm/58mm compact crankset, so I could even install a 29t chainring if I feel really feeble.
 Because the stock bottom bracket was ISIS, I bought a ubiquitous Shimano UN52 68mm x 113mm square taper bottom bracket (complete with the plastic cup on the non-drive side... did I mention I hate those). Keeping the chain on the chainring is a Spot Singlespeed chain guard on the outside and an N Gear Jump Start chain deflector on the inside.
The Spot guard had to be ground down to clear the bulky crank arm... nothing a few minutes with a Dremel and a file didn't cure.
The Jump Start had to be cut so I could tighten the clamp more. You see, the seat tube outer diameter is about 30.3mm and the Jump Start only comes in 3 sizes. I bought the 31.8mm clamp version but perhaps I should've started with the smaller size. Oh well... some careful trimming of the plastic clamp cured that too.
 The SRAM PC-991 chain is a tad on the long side as I may want to try out that new Shimano 12-36 cassette. Oh yeah - about the cassette - that's a SRAM PG-980 11-34 there. I wanted a cassette with a carrier to distribute the load to the freehub better, since SE implied it was aluminum. OK, they said the hub was aluminum - the freehub is steel. Shoulda guessed. With a steel freehub you can run pretty much any cheap cassette you want since the steel freehub won't be affected by individual cogs digging in, whereas cassettes with carriers should ideally be used with softer aluminum freehubs.
Lessee... that's an X.9 long cage hanging there. Yeah, I coulda used a medium or short cage with a 1x9 but I already had the long cage. Maybe I'll snoop around for a cheap shorty.
 Here's a good view of the combo chain tug / derailleur hanger. It works. Also seen here is the bolt-on rear axle which I believe is a conventional 10x1 mm thread. It's a cheap soft POS like the front, and yes it's even a little bent. I will either replace it or go to a QR set-up. I'm not sure the QR thing will work well with those monster axle mounting tabs though.
Speaking of bent, one of the tabs - the left one - is a little bent. Bent as in curved, not the result of a badly aligned weld. Doubt it happened in shipping as the box was intact. Luckily the bend is toward the back and doesn't seem to affect either axle or brake mounting. Again - welds are good, the rest "not so much". As long as it works, I can live with some imperfections... heck, my wife does every day!
 The stock seatpost - a 27.2mm x 350mm unit - looks a lot like this Bontrager post. It was a real nice piece, but I figured I'd eBay the new post and use the Bonty.
 Wheels are Weinmann ZAC 2400 rims with 36 spokes laced to SE-branded hubs. The hubs use simple loose bearings. The rims are v-brake compatible. Bottom line - nothing fancy here (and nothing light!) but they should give some decent service until I find a deal on a better wheelset.
 Until I can think of something else to cover the welded-on v-brake posts, I slipped some black vacuum tubing over 'em. Ugly, but not as fugly as a plain steel post. If I feel bold I may cut 'em off altogether.
 Check out the cool "SE" cut into the left tab. The disc brake mounting slots also seemed cool but they just seem to let the caliper rock back and forth in a random fashion with no real rationale as to why. Perhaps the rock-ability is to accommodate different disc sizes, and/or to allow some fine-tuning of where the brake pads ride. Or maybe it's for easier wheel removal with certain brake set-ups... who knows!
 The stock seatpost - a 27.2mm x 350mm unit - looks a lot like this Bontrager post. It was a real nice piece, but I figured I'd eBay the new post and use the Bonty.
The seat seems real nice so I'll give it a go.
 Wheels are Weinmann ZAC 2400 rims with 36 spokes laced to SE-branded hubs. The hubs use simple loose bearings. The rims are v-brake compatible. Bottom line - nothing fancy here (and nothing light!) but they should give some decent service until I find a deal on a better wheelset.
 Until I can think of something else to cover the welded-on v-brake posts, I slipped some black vacuum tubing over 'em. Ugly, but not as fugly as a plain steel post. If I feel bold I may cut 'em off altogether.
 Check out the cool "SE" cut into the left tab. The disc brake mounting slots also seemed cool but they just seem to let the caliper rock back and forth in a random fashion with no real rationale as to why. Perhaps the rock-ability is to accommodate different disc sizes, and/or to allow some fine-tuning of where the brake pads ride. Or maybe it's for easier wheel removal with certain brake set-ups... who knows!
That brake adapter is a rear 185mm piece cut down to accommodate a 180mm rotor. One nice thing about this set-up: I can get the wheel off without removing or even loosening the brake caliper.
So that's about it for the newest build. Despite some imperfections, I'm happy with how things came together. A quick ride around the 'hood already reveals a velvety smooth ride compared to the aluminum rigid; can't wait to hit the trail!
